如何使用 CodeIgniter 发送电子邮件
在 Web 应用程序中,电子邮件非常重要。当用户注册时,我们可能希望发送一封电子邮件来验证他们的电子邮件地址,并允许用户确认订阅。我们还使用电子邮件来重置忘记的密码,向客户发送发票和收据等。CodeIgniter 使我们能够非常轻松地使用各种选项从应用程序发送电子邮件。
CodeIgniter 具有内置的电子邮件库,我们可以在发送电子邮件时使用它。
CodeIgniter 电子邮件配置
我们需要有一个集中的地方来管理电子邮件设置。CodeIgniter 没有提供电子邮件配置文件,所以我们需要自己创建一个。
在 application/config 目录下创建一个文件 email.php
将以下代码添加到 email.php
<?php defined('BASEPATH') OR exit('No direct script access allowed');

$config = array(
    'protocol' => 'smtp', // 'mail', 'sendmail', or 'smtp'
    'smtp_host' => 'smtp.example.com',
    'smtp_port' => 465,
    'smtp_user' => 'no-reply@example.com',
    'smtp_pass' => '12345!',
    'smtp_crypto' => 'ssl', //can be 'ssl' or 'tls' for example
    'mailtype' => 'text', //plaintext 'text' mails or 'html'
    'smtp_timeout' => '4', //in seconds
    'charset' => 'iso-8859-1',
    'wordwrap' => TRUE
);
此处,
- ‘protocol’ => ‘smtp’,指定发送电子邮件时要使用的协议。这可以是 Gmail smtp 设置或您主机的 smtp 设置
- ‘smtp_host’ => ‘smtp.example.com’,指定 smtp 主机。例如,如果您想使用 Gmail,则会类似 smtp.gmail.com
- ‘smtp_port’ => 465,指定的 smtp 主机上已为 smtp 邮件配置的开放端口
- ‘smtp_user’ => ‘no-reply@example.com’,发送电子邮件时将用作发件人的电子邮件地址。这应该是服务器上存在的有效电子邮件地址
- ‘smtp_pass’ => ‘12345!’,指定 smtp 用户电子邮件的密码
- ‘smtp_crypto’ => ‘ssl’,指定要使用的加密方法,例如 ssl、tls 等。
- ’email type’ => ‘text’,设置要使用的邮件类型。根据您的需求,可以是纯文本或 HTML。
- ‘smtp_timeout’ => ‘4’,指定尝试连接到主机之前可能发生超时异常的秒数。
- ‘charset’ => ‘iso-8859-1’,定义发送电子邮件时要使用的字符集。
- ‘wordwrap’ => 如果设置为 TRUE,则启用单词换行。如果设置为 FALSE,则不启用单词换行
注意:要发送电子邮件,您必须提供有效的配置参数。无效的参数将无法发送电子邮件。
CodeIgniter 电子邮件视图
在本节中,我们将创建发送电子邮件到收件人的视图。
在 application/views 中创建一个新目录 email
在 application/views/email 中创建一个新文件 contact.php
将以下代码添加到 application/views/email/contact.php
<!DOCTYPE html>
<html>
    <head>
        <title>CodeIgniter Send Email</title>
        <meta charset="UTF-8">
        <meta name="viewport" content="width=device-width, initial-scale=1.0">
    </head>
    <body>
        <div>
            <h3>Use the form below to send email</h3>
            <form method="post" action="<?=base_url('email')?>" enctype="multipart/form-data">
                <input type="email" id="to" name="to" placeholder="Receiver Email">
                <br><br>
                <input type="text" id="subject" name="subject" placeholder="Subject">
                <br><br>
                <textarea rows="6" id="message" name="message" placeholder="Type your message here"></textarea>
                <br><br>
                <input type="submit" value="Send Email" />
            </form>
        </div>
    </body>
</html>
此处,
- 我们有一个基本的 HTML 表单,它接受电子邮件、主题和消息,然后将参数传递给电子邮件路由。
CodeIgniter 电子邮件控制器
现在让我们创建将处理发送电子邮件的控制器
在 application/controllers/EmailController.php 中创建一个新文件 EmailController.php
将以下代码添加到 EmailController.php
<?php

defined('BASEPATH') OR exit('No direct script access allowed');

class EmailController extends CI_Controller {

    public function __construct() {
        parent:: __construct();

        $this->load->helper('url');
    }

    public function index() {
        $this->load->view('email/contact');
    }

    function send() {
        $this->load->config('email');
        $this->load->library('email');

        $from = $this->config->item('smtp_user');
        $to = $this->input->post('to');
        $subject = $this->input->post('subject');
        $message = $this->input->post('message');

        $this->email->set_newline("\r\n");
        $this->email->from($from);
        $this->email->to($to);
        $this->email->subject($subject);
        $this->email->message($message);

        if ($this->email->send()) {
            echo 'Your Email has successfully been sent.';
        } else {
            show_error($this->email->print_debugger());
        }
    }
}
此处,
- class EmailController extends CI_Controller {…} 定义了我们的电子邮件控制器,它扩展了父 CodeIgniter 控制器。
- public function __construct() {…} 定义了调用父构造函数方法的子构造函数。
- public function index() {…} 定义了显示联系表单的索引方法
- function send() {…} 定义了发送电子邮件的方法
- $this->load->config(’email’); 加载电子邮件配置设置
- $this->load->library(’email’); 加载电子邮件库
- $from = $this->config->item(‘smtp_user’); 从我们定义的电子邮件配置文件中获取发件人 ID。
- $to = $this->input->post(‘to’); 从提交的表单中获取 to 值
- $subject = $this->input->post(‘subject’); 从表单设置电子邮件主题
- $message = $this->input->post(‘message’); 从表单设置电子邮件消息
- $this->email->set_newline(“\r\n”); 定义电子邮件的新行字符
- $this->email->from($from); 设置发件人电子邮件地址
- $this->email->to($to); 设置收件人电子邮件地址
- $this->email->subject($subject); 设置电子邮件主题
- $this->email->message($message); 设置电子邮件消息
- if ($this->email->send()) {…} 尝试发送电子邮件。如果电子邮件发送成功,则显示消息“您的电子邮件已成功发送”,否则将显示有关可能出错之处的调试信息。
现在让我们定义电子邮件路由
电子邮件路由
将以下路由添加到 application/config/routes.php
$route['send-email'] = 'EmailController';
$route['email'] = 'EmailController/send';
我们现在可以在 Web 浏览器中加载联系人表单
让我们启动内置的 PHP 服务器
打开终端/命令行并导航到应用程序的根目录。在我的例子中,根目录位于 C:\Sites\ci-app 驱动器
cd C:\Sites\ci-app
使用以下命令启动服务器
php -S localhost:3000
在浏览器中加载以下 URL:https://:3000/send-email
您应该能够看到以下表单
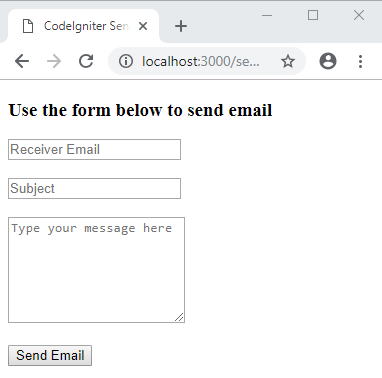
输入收件人电子邮件、主题和电子邮件消息,然后单击“发送电子邮件”。如果您的电子邮件配置设置正确,您应该会看到成功消息。
摘要
内置的电子邮件库使我们能够用最少的代码轻松发送电子邮件。该库也非常灵活,您可以根据需要进行配置。