如何在 CodeIgniter 中上传图片和文件(附示例)
CodeIgniter 文件上传
文件管理对于大多数 Web 应用程序来说至关重要。如果您正在开发内容管理系统,那么您需要能够上传图片、Word 文档、PDF 报告等。如果您正在开发会员网站,您可能需要为人们上传他们的个人资料图片提供便利。CodeIgniter 的文件上传类使我们能够轻松完成以上所有工作。
在本教程中,我们将介绍如何使用文件上传库来加载文件。
在 CodeIgniter 中上传图片
CodeIgniter 中的文件上传包含两个主要部分:前端和后端。前端由使用 input type file 的 HTML 表单处理。在后端,文件上传库会处理来自表单的提交输入,并将其写入上传目录。
让我们从输入表单开始。
在 application/views 目录中创建一个名为 files 的新目录
在 application/views/files 中添加以下文件
- upload_form.php – 此视图包含 HTML 表单,该表单具有文件类型的输入,并将选定的文件提交给服务器进行处理
- upload_result.php – 此视图显示上传图片的結果,包括一个我们可以点击查看結果的链接。
将以下代码添加到 upload_form.php
<!DOCTYPE html>
<html>
<head>
    <title>CodeIgniter Image Upload</title>
    <meta charset="UTF-8">
    <meta name="viewport" content="width=device-width, initial-scale=1.0">
</head>
<body>
    <div>
        <h3>Select an image from your computer and upload it to the cloud</h3>
        <?php
                if (isset($error)){
                    echo $error;
                }
            ?>
            <form method="post" action="<?=base_url('store-image')?>" enctype="multipart/form-data">
                <input type="file" id="profile_image" name="profile_image" size="33" />
                <input type="submit" value="Upload Image" />
            </form>
    </div>
</body>
</html>
此处,
- if (isset($error)){…} 检查 error 变量是否已设置。如果结果为 true,则将上传库返回的错误显示给用户。
- <input type=”file” id=”profile_image” name=”profile_image” size=”33″ /> 文件类型允许用户浏览其计算机并选择一个文件进行上传。
将以下代码添加到 upload_result.php
<!DOCTYPE html>
<html>
<head>
    <title>Image Upload Results</title>
    <meta charset="UTF-8">
    <meta name="viewport" content="width=device-width, initial-scale=1.0">
</head>
<body>
    <div>
        <h3>Congratulations, the image has successfully been uploaded</h3>
        <p>Click here to view the image you just uploaded
            <?=anchor('images/'.$image_metadata['file_name'], 'View My Image!')?>
        </p>

        <p>
            <?php echo anchor('upload-image', 'Go back to Image Upload'); ?>
        </p>
    </div>
</body>
</html>
此处,
- <?=anchor(‘images/’.$image_metadata[‘file_name’], ‘查看我的图片!’)?> 使用 anchor 辅助函数在 images 目录中创建指向新上传文件的链接。文件名是从文件成功上传时传递到视图的图像元数据中检索的。
现在让我们创建将响应我们图像上传的控制器
在 application/controllers 中添加一个新文件 ImageUploadController.php
将以下代码添加到 ImageUploadController.php
<?php

defined('BASEPATH') OR exit('No direct script access allowed');

class ImageUploadController extends CI_Controller {

    public function __construct() {
        parent::__construct();
        $this->load->helper('url', 'form');
    }

    public function index() {
        $this->load->view('files/upload_form');
    }

    public function store() {
        $config['upload_path'] = './images/';
        $config['allowed_types'] = 'gif|jpg|png';
        $config['max_size'] = 2000;
        $config['max_width'] = 1500;
        $config['max_height'] = 1500;

        $this->load->library('upload', $config);

        if (!$this->upload->do_upload('profile_image')) {
            $error = array('error' => $this->upload->display_errors());

            $this->load->view('files/upload_form', $error);
        } else {
            $data = array('image_metadata' => $this->upload->data());

            $this->load->view('files/upload_result', $data);
        }
    }

}
此处,
- class ImageUploadController extends CI_Controller {…} 定义我们的控制器类并扩展基类控制器 CI_Controller
- public function __construct() {…} 初始化父构造函数并加载 url 和 form 助手
- public function index() {…} 定义用于显示图像上传表单的 index 方法
- public function store() {…} 定义将上传图像并将其存储在 Web 应用程序服务器上的方法。
- $config[‘upload_path’] = ‘./images/’; 设置应上传图片的目录
- $config[‘allowed_types’] = ‘gif|jpg|png’; 定义可接受的文件扩展名。这对于安全至关重要。允许的类型确保只上传图片,而不能上传 php 等其他文件类型,因为它们有可能会损害服务器。
- $config[‘max_size’] = 2000; 设置最大文件大小(以千字节为单位)。在我们的示例中,最大可上传文件为 2,000 KB,接近 2MB。如果用户尝试上传大于 2,000 KB 的文件,则图片将无法上传,并且库将返回错误消息。
- $config[‘max_width’] = 1500; 设置图像的最大宽度,在我们的情况下为 1,500 像素。任何大于此宽度的图像都会导致错误
- $config[‘max_height’] = 1500; 定义可接受的最大高度。
- $this->load->library(‘upload’, $config); 加载上传库并使用我们上面定义的 $config 数组对其进行初始化。
- if (!$this->upload->do_upload(‘profile_image’)) {…} 尝试上传提交的图像,在本例中为 profile_image
- $error = array(‘error’ => $this->upload->display_errors()); 如果上传失败,则设置错误消息
- $this->load->view(‘files/upload_form’, $error); 加载文件上传表单并显示从上传库返回的错误消息
- $data = array(‘image_metadata’ => $this->upload->data()); 如果上传成功,则设置图像元数据
- $this->load->view(‘files/upload_result’, $data); 加载上传成功视图并将上传的文件元数据传递过去。
以上就是控制器的全部内容。现在让我们创建将上传图片的目录。在应用程序的根目录中创建一个名为“images”的新目录
最后,我们将向 routes.php 文件添加两个路由,用于显示表单和显示结果
Open application/config/routes.php
Add the following routes
$route['upload-image'] = 'imageuploadcontroller';
$route['store-image'] = 'imageuploadcontroller/store';
此处,
- $route[‘upload-image’] = ‘imageuploadcontroller’; 定义 URL upload-image,该 URL 调用 ImageUploadController 的 index 方法
- $route[‘store-image’] = ‘imageuploadcontroller/store’; 定义 URL store-image,该 URL 接受用户选择的文件并将其上传到服务器。
测试应用程序
让我们启动内置的 PHP 服务器
打开终端/命令行并导航到应用程序的根目录。在我的情况下,根目录位于 C:\Sites\ci-app 驱动器
cd C:\Sites\ci-app
使用以下命令启动服务器
php -S localhost:3000
在您的 Web 浏览器中加载以下 URL:https://:3000/upload-image
您将能够看到以下结果
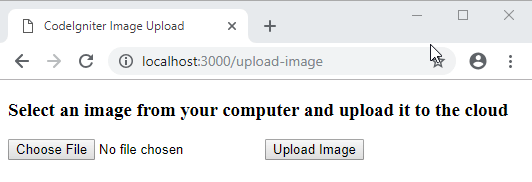
点击选择文件
您应该能看到一个类似以下的对话窗口
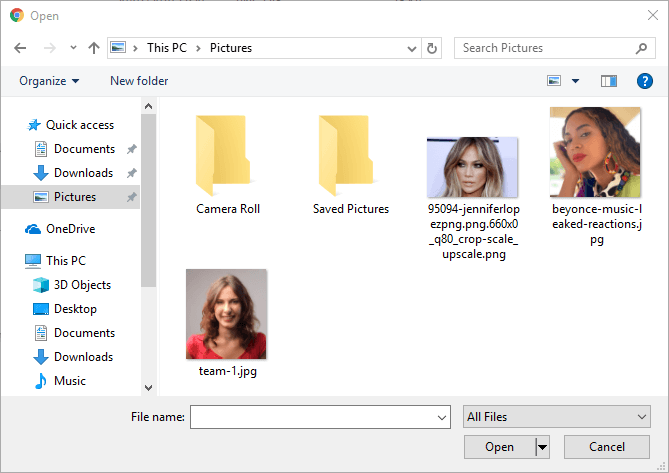
选择您想要的图片,然后点击打开
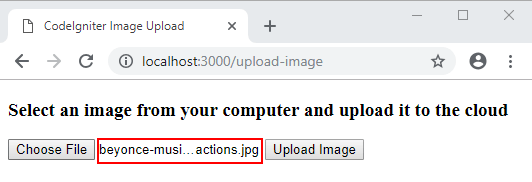
选定的文件名将显示在表单上传中,如上图所示。点击上传图片按钮
如果一切顺利,您将得到以下结果

点击“查看我的图片!”链接
您应该能够看到您上传的图片。结果将与以下内容类似

请注意,上传的图片名称显示在 URL 中。我们从上传的图片元数据中获取了图片名称
注意:其他类型文件的文件上传过程保持不变